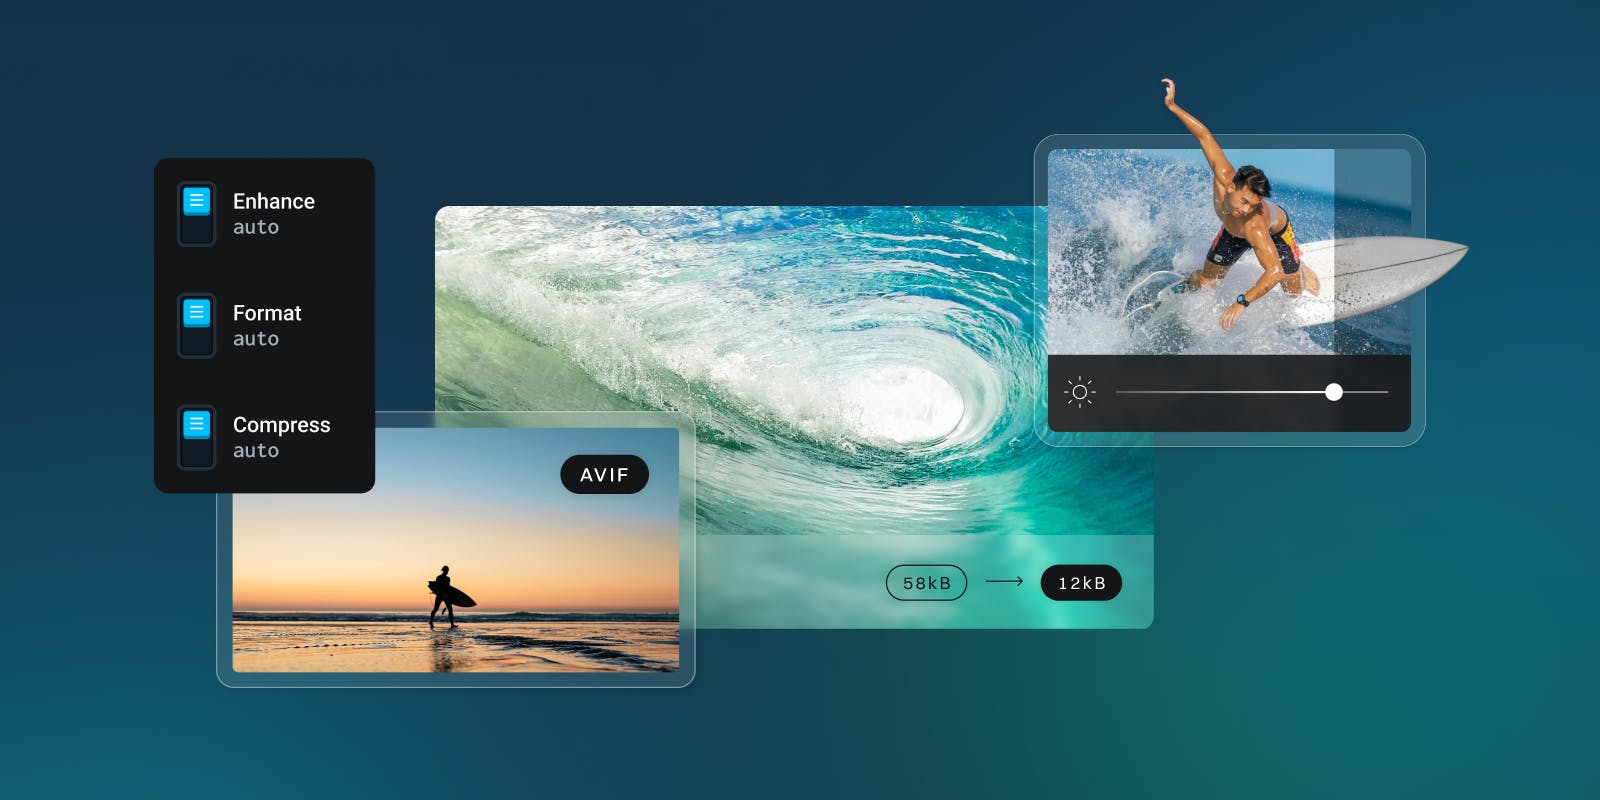
Enhancing the speed and quality of your images isn't just an upgrade—it's a transformative step for any website. Whether you are showcasing products or sharing content, this optimization ensures that your audience experiences your brand at lightning speed, with crystal-clear quality. The result? A smoother, more engaging user journey that not only retains attention but also boosts conversions and engagement.
imgix's auto parameters are designed to offer you this competitive edge. Check out our recommended best practices for default settings that simplify the core of image optimization to a matter of clicks, without the need for any coding.
Recommended Default Parameters
The set of default parameters that will give you the best results depends on the images in your catalog, design requirements, and your priorities around compression/speed savings, color fidelity, and overall image quality. Applying any setting across a large group of images involves tradeoffs, so we recommend considering the following guidelines to help you navigate these tradeoffs effectively.
auto=format: Converts your images to next-gen formats such as AVIF or WebP. We recommend applying this default to all your Sources. Modern file formats offer unparalleled compression that result in smaller file sizes, accelerated loading times, superior image quality, improved SEO rankings, and energy efficiency, all while future-proofing your web content.auto=compress: Provides significant file size savings, especially when paired with auto=format. However, it may slightly compromise image quality and color fidelity.cs=srgb: Prevents color changes that may happen to an image as a result of auto=compress.q: If auto=compress requires too much modification for your use cases, you can apply its component parts individually, either as overrides or as defaults themselves.w,h,fit,crop: If your design requires a specific size and/or crop across all your assets, you can apply these defaults. This doesn’t preclude creating other sizes or crops as needed, so it’s a great way to generate the most-often-accessed size you’ll need automatically (i.e., product photos in your default store layout or a hero image for an article).
How to Set Up Default Parameters
- Sign in and go to your Sources admin page.
- Click on the Settings button and choose “Edit Source”.
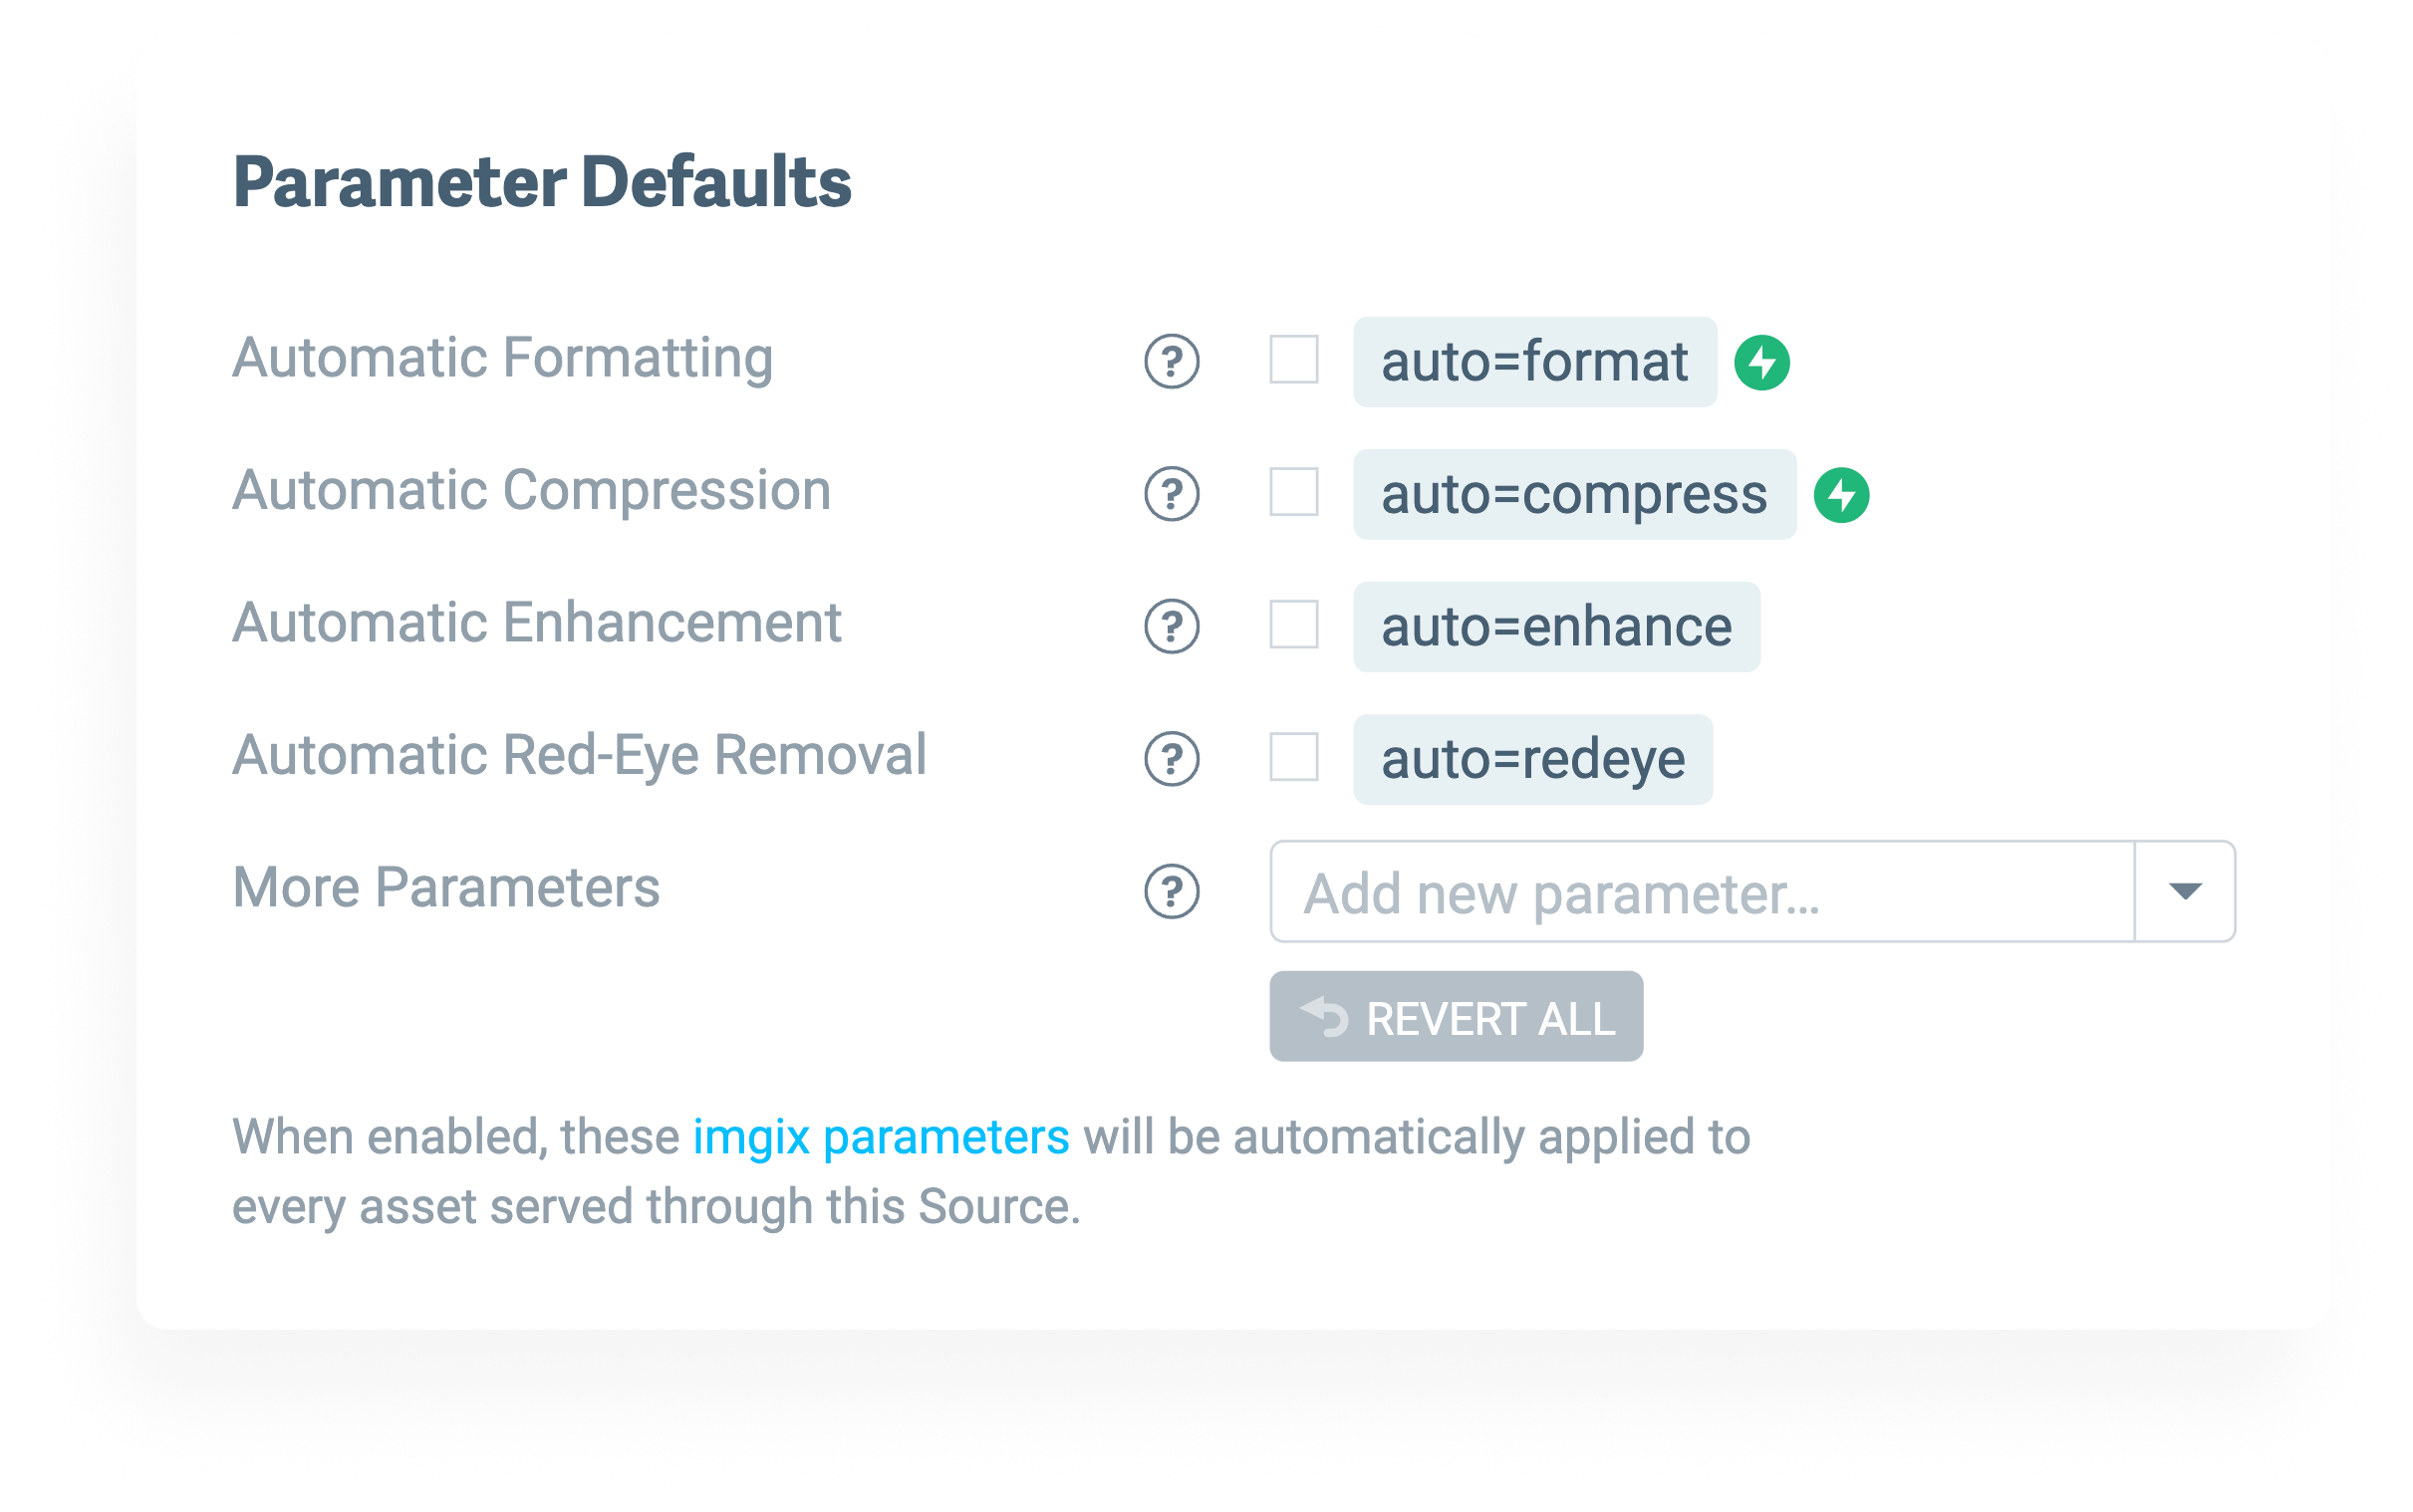
- Under "Parameter Defaults", check the boxes for the parameters you’d like to set as defaults. At the minimum, we recommend applying 'auto=format' as a default to all your Sources to ensure you're leveraging the benefits of best-in-class file formats. You may also add as many parameter/value pairs as you'd like to set your defaults by choosing a parameter from the dropdown menu and providing the value.
- Click “Review” to double check your new settings.
- Click “Deploy This Config” to deploy the new settings to any subsequent image requests to that Source. Due to caching, you may need to purge the Source to see your changes right away on an individual image.
Setting imgix default parameters will cause Sources to override the default imgix behavior for passing original images through the rendering service. It will also affect the default rendering behavior of PDFs, SVGs and GIFs. If you wish to use default parameters for your Source while maintaining default rendering behavior for some assets, we recommend serving those types of assets in a separate Source without default parameters applied.
How to Override Defaults for Certain Assets
There may be images or specific uses of your images where you want to override the defaults you have set (i.e., changing to a higher quality level). To override any of your settings, just provide new values for the parameters you want to change within the specific image URL.
Let’s take a look at an example where you might want to override the cs (color space) part of auto=compress. The original image is fairly small already, but we can save over 50% by making that the default.

https://assets.imgix.net/examples/kingfisher.jpg?fit=crop&h=300&w=300&usm=20
auto=compress – 8KB https://assets.imgix.net/examples/kingfisher.jpg?fit=crop&h=300&w=300&usm=20&auto=compress
This image still looks pretty sharp, but the color has washed out a little due to the removal of the color profile. Luckily, we can override that and give the image a smaller color profile using cs=tinysrgb with almost the same file size savings.
auto=compress&cs=tinysrgb – 9KB
https://assets.imgix.net/examples/kingfisher.jpg?fit=crop&h=300&w=300&usm=20&auto=compress&cs=tinysrgb
Note: To override the q or cs components of auto=compress, you will need to explicitly provide a q or cs value.
When overriding, you can also apply additional parameters to images as needed.
Additional Strategies to Simplify Your Workflows and URLs
Applying and Hiding Watermarks
Another great way to use default parameters is to watermark your entire image catalog. This is particularly useful for photographers, stock photo sites, or any other application where you want to discourage unauthorized downloading and protect your copyright.
Default parameters allow you to both apply a watermark at the Source level and hide its URL to make removal impossible without retouching.
- Upload the image you want to use as a watermark to your Source.
- Apply any additional operations to the mark that you’d like, such as size, cropping, and alignment. You can do this easily by pasting the URL of your watermark into our Sandbox and then adding and adjusting parameters to get a final URL.
- Once you have the final URL for your watermark, encode it and follow the steps above to add it to your default parameters, as the value for
mark. It should look something like this:
https://assets.imgix.net/presskit/imgix-presskit.pdf?page=4&fm=png&w=320
mark=https%3A%2F%2Fassets.imgix.net%2Fpresskit%2Fimgix-presskit.pdf%3Fpage%3D4%26fm%3Dpng%26w%3D320
mark64=aHR0cHM6Ly9hc3NldHMuaW1naXgubmV0L3ByZXNza2l0L2ltZ2l4LXByZXNza2l0LnBkZj9wYWdlPTQmZm09cG5nJnc9MzIw
Note: When using Base64 encoding, the parameter name must be changed to its Base64 equivalent as well (mark64 in this case).
See the documentation for more detail about using mark.
Simplifying Signed Images
Signing your images is a key way to prevent bandwidth theft and unauthorized alterations. By appending an algorithmically-generated hash to the image with the s parameter, you can prevent others from changing the parameters. See the Securing Assets guide for more information and setup instructions.
The hash is generated based on the full image URL (including parameters), so setting default parameters offers an additional security advantage. They aren’t listed in the final URL, so if you need to change the default parameters, you will not need to re-sign the image as long as no overrides or additional parameters are applied.
If you have even a few parameters defined, this can make managing your image URLs workflow much simpler. Just change the defaults as needed behind the scenes, with no rework needed on the front end.
https://sample-src.imgix.net/llama.jpg?w=600&h=400&fit=crop&auto=compress&s=e888a56c126b87b35761717b4cd9c44a
The value of s will change if any of the parameters are changed.
https://sample-src.imgix.net/llama.jpg?s=9addc356821738d5ec4d25ba609cc469
This will stay the same even when the default parameters change.
imgix’s default parameters enable you to immediately serve all your images to your specifications without any coding, offering the simplest integration imaginable. Set them up on your Source today to see how easy optimizing your visual assets can be.
If you need help determining which default parameters would work best for you, please reach out to your Account Manager or our Support Team.